Views: 0 Author: Site Editor Publish Time: 2026-09-17 Origin: Site
Transitioning from traditional drywall or heavy timber to a modern composite setup requires shifting your focus. You must look beyond raw materials to understand structural integration. Modern interiors coordinate multiple elements perfectly to create a unified architectural finish. At the decision stage, the core challenge isn’t deciding if composite wood is durable enough. Instead, you must figure out how to engineer a seamless transition between vertical and horizontal planes. A successful rollout requires upfront site assessment. You must plan for structural loads and set strict procurement criteria. Read on to discover the exact framework you need for planning your installation. You will learn how to manage thermal expansion effectively. We will guide you through evaluating sub-structures accurately. Finally, you will discover how to select reliable vendor components for a flawless interior upgrade.
Structural prerequisites dictate module choice: Assess wall plumbness and ceiling load-bearing capacity before selecting specific WPC profiles.
Thermal expansion is the primary failure point: Proper planning for expansion gaps and sub-framing separates lasting installations from warped failures.
Integration requires specialized components: Combining a modular WPC wall system with a ceiling setup demands specific interlocking trims and transition joints, not just standard panels.
Evaluate vendors on compliance, not just aesthetics: Shortlist suppliers based on verifiable fire ratings, moisture resistance data, and warranty terms.
Identify the moisture and climate zone carefully before beginning any work. First, determine if your installation spans indoor-to-outdoor transition areas. Covered patios connecting to living rooms experience different environmental stress levels. Temperature shifts cause materials to expand differently across these distinct zones. Next, define your daily humidity exposure. Commercial bathrooms require maximum moisture resistance to prevent mold. Climate-controlled lobbies face fewer humidity swings. You must determine the required composite density based on these environmental factors. High-density composites resist moisture penetration significantly better in damp environments.
Evaluate the sub-structure reality with precision. Every successful custom interior system relies heavily on the existing substrate condition. You face a crucial decision point early in the process. Will you mount panels directly to the wall? This direct method requires perfectly plumb surfaces. Uneven drywall will telegraph imperfections straight through your decorative panels. Alternatively, you can build out a batten or joist framework. Furring strips help correct severe wall unevenness easily. They also provide essential space for airflow and cable management behind the panels.
Calculate thermal expansion tolerances meticulously. Wood-plastic composites expand and contract naturally as weather changes. You must map out temperature fluctuations within the specific space. Measure the highest expected summer heat and lowest winter temperatures. Here are the key considerations for managing expansion:
Plan mandatory perimeter gaps at all edges.
Leave exactly 5-10mm of clearance at floor and ceiling junctions.
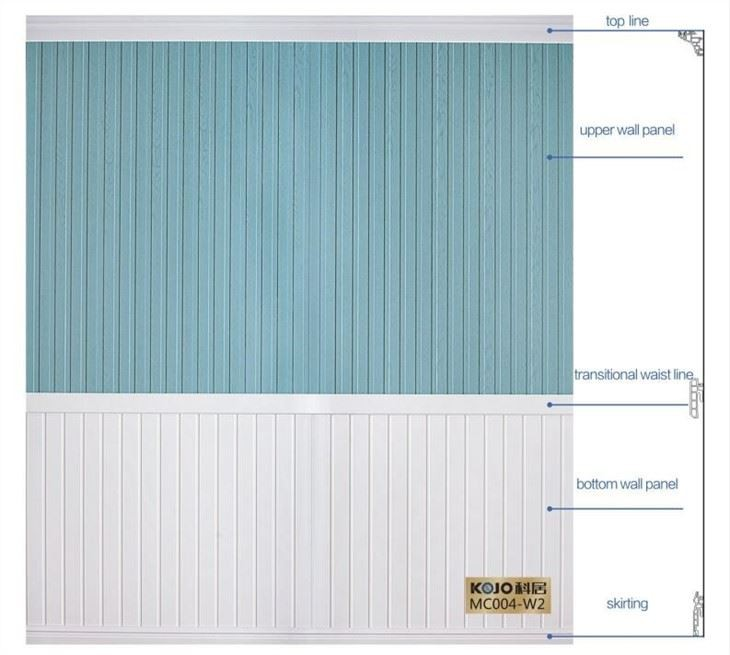
Use matching baseboards and crown molding to conceal these functional gaps.
Avoid caulking the expansion joints rigidly, as this prevents natural shifting.
If you skip this step, panels will inevitably buckle under pressure.
Profile selection dictates both aesthetics and long-term durability. You must choose a WPC wall assemble module based on its intended application. Compare fluted panels against flat panels carefully. Fluted or slatted designs offer notable acoustic benefits. They break up sound waves effectively in large, echo-prone rooms. They also provide excellent decorative texture for feature walls. However, flat panels perform better in high-impact zones. Corridors and commercial spaces benefit from smooth, easy-to-clean flat surfaces. You should also assess square combination panels. These provide immense geometric design flexibility. They allow you to create unique grid patterns easily in modern spaces.
Table: WPC Profile Comparison Chart
Profile Type | Best Application | Acoustic Rating | Impact Resistance |
|---|---|---|---|
Fluted (Slatted) Panels | Feature walls, quiet rooms | High | Medium |
Flat Panels | High-traffic corridors, kitchens | Low | High |
Square Combination | Ceiling accents, modern lobbies | Medium | Medium |
Evaluate interlocking mechanisms and hardware closely. A well-engineered clip and groove system provides superior structural stability. Inspect the hardware materials before purchasing. Concealed metal clips offer better longevity than cheap plastic alternatives. They also provide better movement tolerance than direct-nailing methods. Nailing directly through panels restricts natural thermal movement. This restriction often causes hairline cracks over time.
Finally, scrutinize marketing claims thoroughly. Manufacturers heavily promote their products to eager buyers. They might market a quick installation wall system to promise time savings. You must verify the hidden labor involved. Does the system require proprietary edge trims? Custom trims can delay projects significantly if backordered. Ask how the system handles complex corners. Are corners pre-fabricated at the factory? Do they require onsite mitering by skilled carpenters? Factory-finished corners save hours of frustrating installation labor.
Ceiling installations introduce serious gravity risks into your project. Wall panels rest vertically against studs. Ceiling panels hang completely overhead. You must assess the total weight per square meter of your chosen WPC ceiling system. Safety always comes first during overhead work. Choose between two main suspension frameworks. You can direct-mount panels securely to existing ceiling joists. This traditional method saves precious ceiling height. Alternatively, you can utilize a suspended metal grid framework. Suspended grids hide HVAC ducts and plumbing effortlessly.
Plan your lighting and utility integration early. You must map out all cutouts for HVAC vents beforehand. Mark specific locations for recessed lighting and sprinkler heads prior to ordering materials. Cutting composite materials requires technical care. Wood-plastic composite requires specific hole-saw techniques. Standard drill bits can easily cause surface delamination or chipping. Factor this reality into your contractor skill requirements. Only hire professionals experienced in advanced composite fabrication.
Wall-to-ceiling transitions require careful detailing. You cannot simply butt horizontal panels directly against vertical panels. Follow these specific steps for executing flawless interior transitions:
Select appropriate cornice or L-trim modules for the entire room perimeter.
Leave a dedicated 5mm expansion channel hidden behind the trim piece.
Ensure the joint between the modular WPC wall system and the ceiling allows for independent material movement.
Secure the trims directly to the wall framework, allowing the ceiling panels to float above.
Following this precise sequence prevents the ceiling from pushing down on the walls during summer expansion.
Establish clear thresholds for contractor involvement early on. Standard feature walls often fall perfectly into the DIY category. Enthusiastic homeowners can handle straightforward flat panel installations easily. However, full room wraps demand significantly more technical expertise. Projects involving ceiling suspensions require specialized carpentry skills. You need precise leveling and robust structural anchoring overhead. Ensure your installation team has access to the right tools. Keep fine-tooth circular saws ready for clean, chip-free cuts. Use laser levels for establishing true plumb lines across long distances. Stock up on heavy-duty structural adhesives for reliable secondary bonding.
Mandate strict acclimation protocols onsite. Composite materials react to local climate conditions immediately upon delivery. You must enforce a 48-to-72-hour onsite acclimation period. Place the boxed materials in the actual installation room before starting. Keep the room at normal living temperatures during this time. This simple step minimizes post-install shrinkage or expansion significantly. Skipping proper acclimation remains a common installation mistake. It routinely leads to buckling panels weeks later.
Plan waste and overage calculations properly. Never order the exact square footage of your measured room. Plan a strict 10-15% material overage for every order. Complex room geometries generate extra useless offcuts. Diagonal installations waste even more material at the borders. Having extra panels ensures matching dye lots perfectly. Reordering extra panels later often results in slight, noticeable color variations.
Never choose vendors based solely on digital marketing photos. You must demand verifiable documentation for compliance and safety standards. Ask manufacturers for specific fire-retardant classes. Commercial spaces typically require Class A or Class B fire ratings by law. Residential projects still benefit greatly from these added safety margins. Request formaldehyde emission standards documentation upfront. Look for E0 or E1 certifications specifically. These strict standards ensure healthy indoor air quality for occupants.
Review the warranty exclusions carefully before paying. Many buyers miss the crucial fine print. Watch for restrictive clauses regarding UV fading. Panels exposed to direct sunlight might lose color over time. Check the specific water submersion limits listed in the manual. Basic moisture resistance does not always mean fully waterproof. Know exactly what actions void your coverage before signing any purchasing agreements.
Implement a rigorous sample testing protocol. Never procure bulk materials based on website renders. Computer monitors display colors inaccurately. Instead, order physical samples directly to your site. You need to test scratch resistance yourself using everyday objects. Check the joint snugness between connecting sample pieces. Finally, evaluate the true composite color under your project's specific lighting conditions. Morning sunlight looks very different from artificial evening lighting.
Planning a comprehensive WPC wall and ceiling architecture requires deep attention to detail. It is primarily an exercise in structural preparation and thermal movement management. Success relies on evaluating your climate, preparing the substrate, and managing material expansion correctly. Do not rush the procurement phase. Take the time to scrutinize vendor claims and verify safety compliances. As a next step action, finalize your exact room square footage today. Assess your current substrate conditions carefully. Finally, request physical interlocking samples and compliance data from your top three shortlisted manufacturers to make an informed decision.
A: Yes, but typically only if utilizing a sub-frame like furring strips or battens. Direct gluing to wallpaper is structurally unsound due to poor adhesion and weight limits. Tiles offer better adhesion, but grout lines cause uneven surfaces. Building a mechanical sub-frame ensures a perfectly plumb finish and long-lasting stability.
A: The WPC panels themselves are not load-bearing. You cannot hang fixtures directly from the composite material. Any fixtures, such as ceiling fans or heavy chandeliers, must be anchored directly through the WPC into the structural joists above. Use appropriate threaded rods or heavy-duty anchors secured into the primary ceiling framework.
A: No. Unlike natural timber, WPC requires no sealing, oiling, or painting. The composite material naturally resists moisture and decay. Cleaning requires only non-abrasive, pH-neutral solutions. Avoid harsh chemical cleaners or stiff brushes. These can degrade the surface cap layer over time. A simple wipe down with a damp microfiber cloth keeps panels looking new.
A: Most premium vendors supply matching L-shaped trims, internal corner lines, and external corner caps. These provide clean, durable edges. Alternatively, experienced installers can use a v-groove router technique. This involves routing the back of the panel and folding it. The folding technique creates a seamless, continuous wood grain wrap around outside corners.